Manual Selfie Capture
This module includes a Fragment that allows the user take a selfie with a click of a button. The difference from the Auto Selfie is just there is no button in Auto Selfie as the selfie is taken automatically on AutoSelfie.
Flow overviewFlowchart of this module's usage within the SDK flow. Expand to view it, click the chart to enlarge.
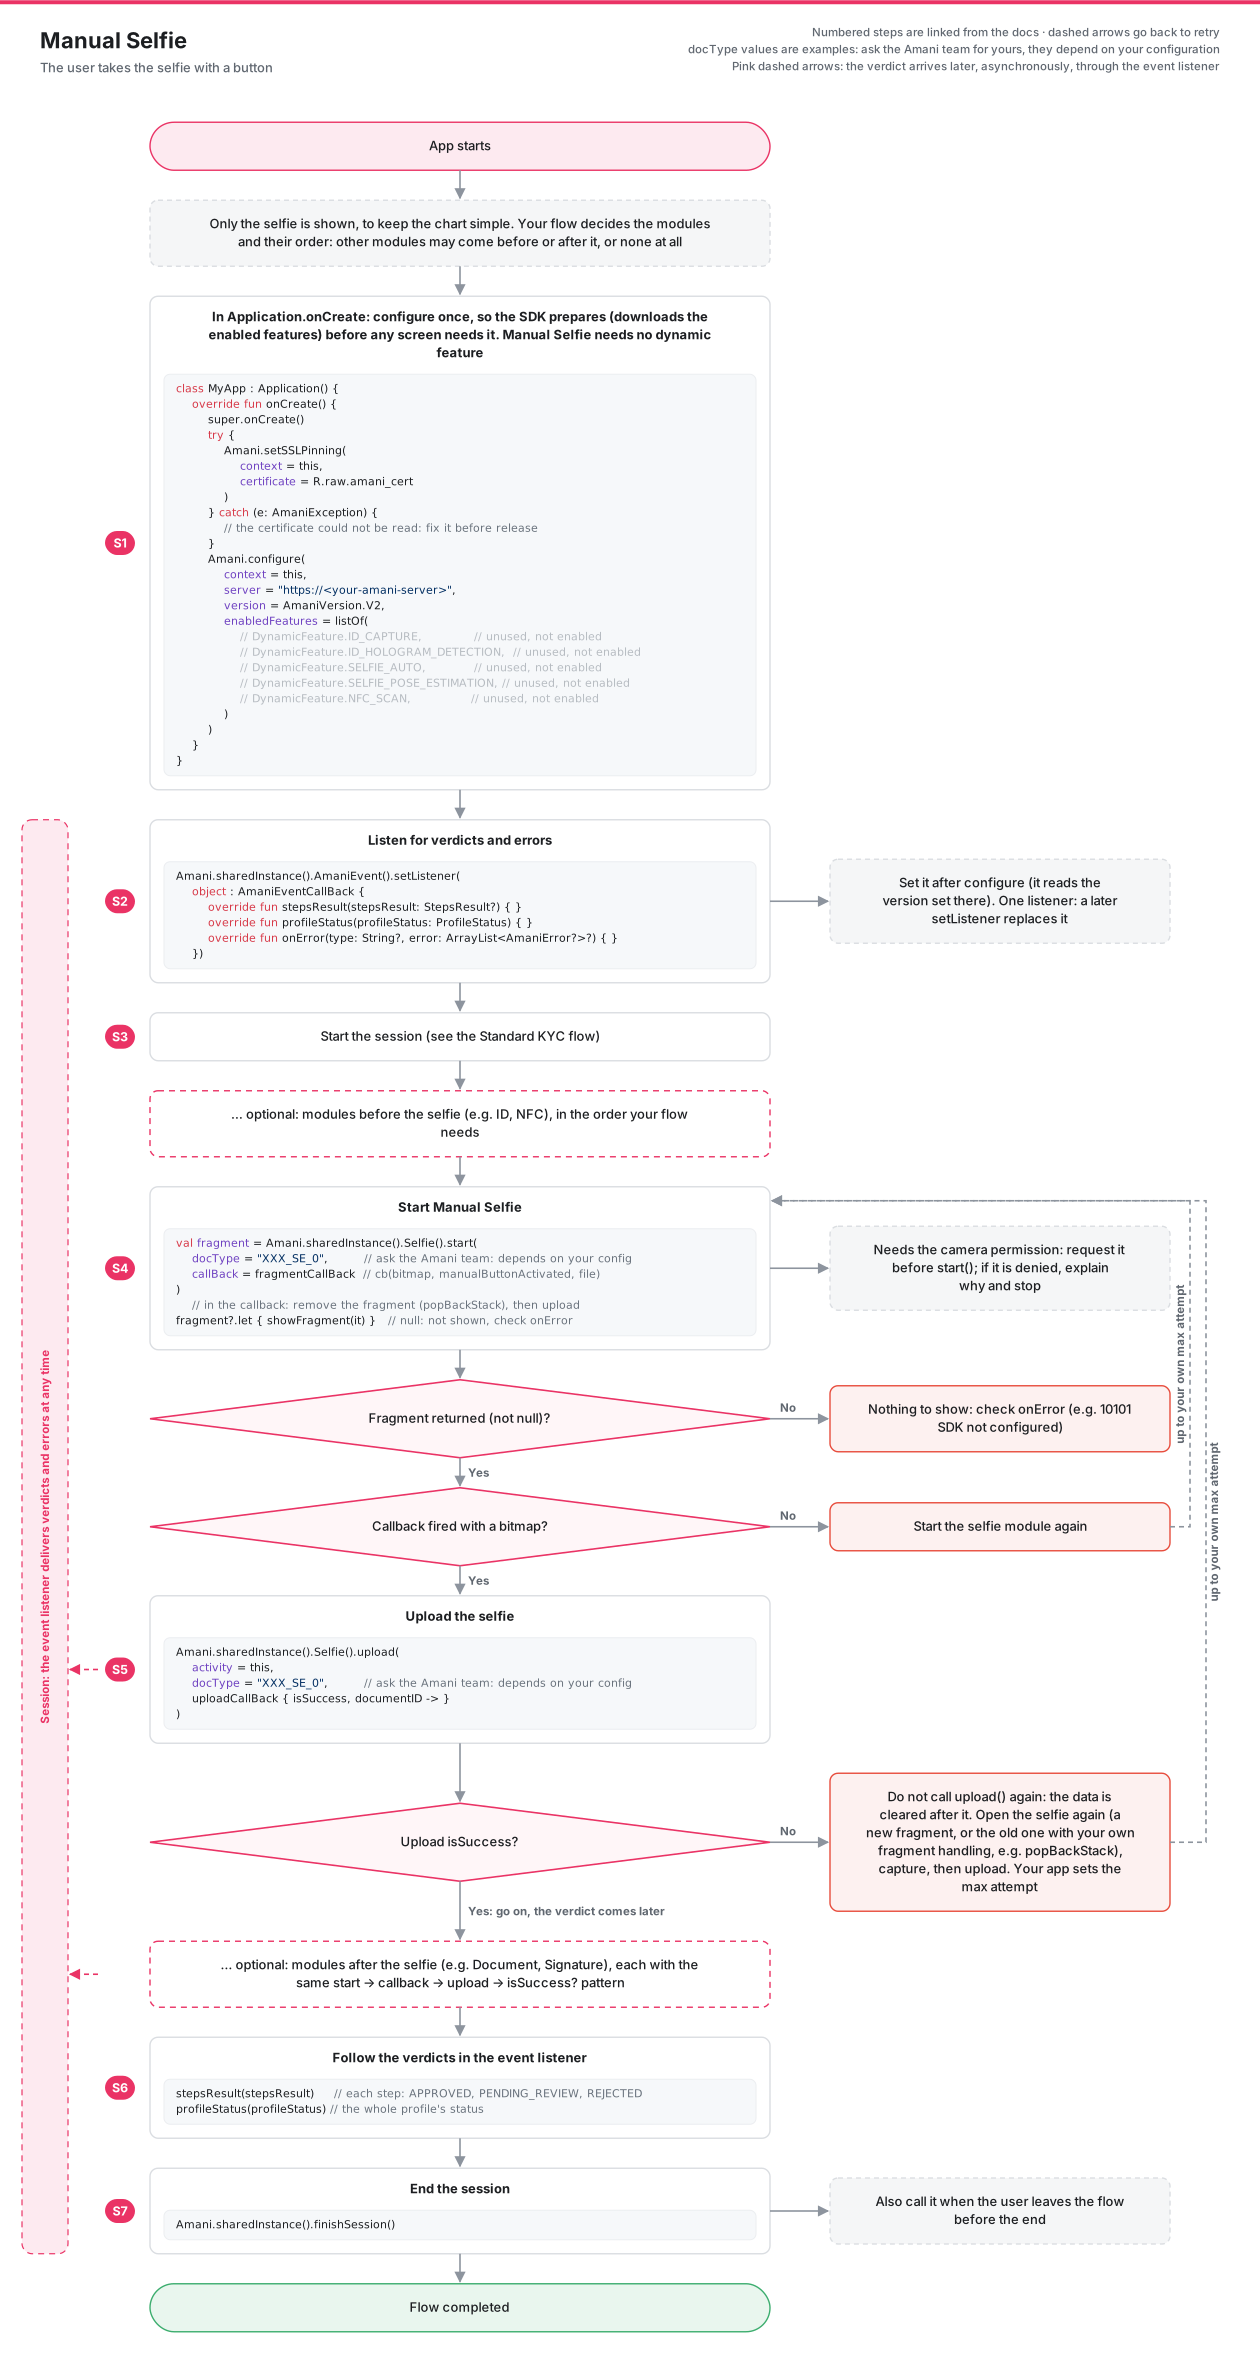
- S1: configure in
Application.onCreate; Manual Selfie needs no dynamic feature. - S2, S3: set the event listener with
AmaniEvent().setListener(...), then start the session. - S4:
Selfie().start(...); show the returned fragment (null means: checkonError); start again if the callback brings no bitmap. - S5: upload the selfie. A successful upload goes on, the verdict arrives later. If the upload fails or the step is REJECTED, do not call
upload()again: the data is cleared after it. Open the selfie again (a new fragment, or the old one with your own fragment handling, e.g.popBackStack), capture, then upload, up to your own max attempt. - S6, S7: follow the verdicts in
stepsResult/profileStatus, and callfinishSession()at the end. - Other modules may come before or after the selfie, in the order your flow needs; the chart shows the selfie alone to keep it simple.
Starting the Selfie capture
Add the imports below:
import ai.amani.sdk.Amani
import ai.amani.sdk.interfaces.IFragmentCallBack
import android.graphics.Bitmap
import java.io.File
Then start the manual selfie capture and get its Fragment as shown below:
// Getting the Fragment view of Selfie
val fragment = Amani.sharedInstance()
  .Selfie()
  .start(
    "XXX_SE_0",
    object : IFragmentCallBack {
      override fun cb(bitmap: Bitmap?, manualButtonActivated: Boolean?, file: File?) {
        // If bitmap is not null, selfie is taken successfully.
        // The upload function can be called.
      }
    }
  )

// Navigating to the fragment view
fragment?.let {
  replaceFragmentWithBackStack(R.id.frame_manual_selfie, it)
}
Uploading the Captured Selfie
The upload method has to be called after the result of the start method is successful.
Otherwise you'll encounter an error in the Errors() object when called.
Add the imports below:
import ai.amani.sdk.Amani
Then upload the captured selfie as shown below:
//Uploading the current taken Selfie data
Amani.sharedInstance()
           .Selfie()
           .upload(
           requireContext(),
           "XXX_SE_0"
       ) { isSuccess ->
           if (isSuccess) {
               Log.i(TAG, "Selfie is uploaded")
           } else {
               Log.e(TAG, "Selfie could not be uploaded")
           }
       }
A true result means the document reached the server, not that it was approved. Verification runs asynchronously on the backend, so the outcome arrives later through the event listener rather than here.
Alternatively, if you need the ID of the uploaded document, pass the uploadCallBack { ... } helper instead of the callback above. Everything else stays the same:
import ai.amani.sdk.interfaces.uploadCallBack

Amani.sharedInstance()
    .Selfie()
    .upload(
        requireContext(),
        "XXX_SE_0",
        uploadCallBack { isSuccess, documentID ->
                // isSuccess is true when the document is uploaded
                // documentID is the ID of the uploaded document
        }
    )